Connection of optional shunt releases
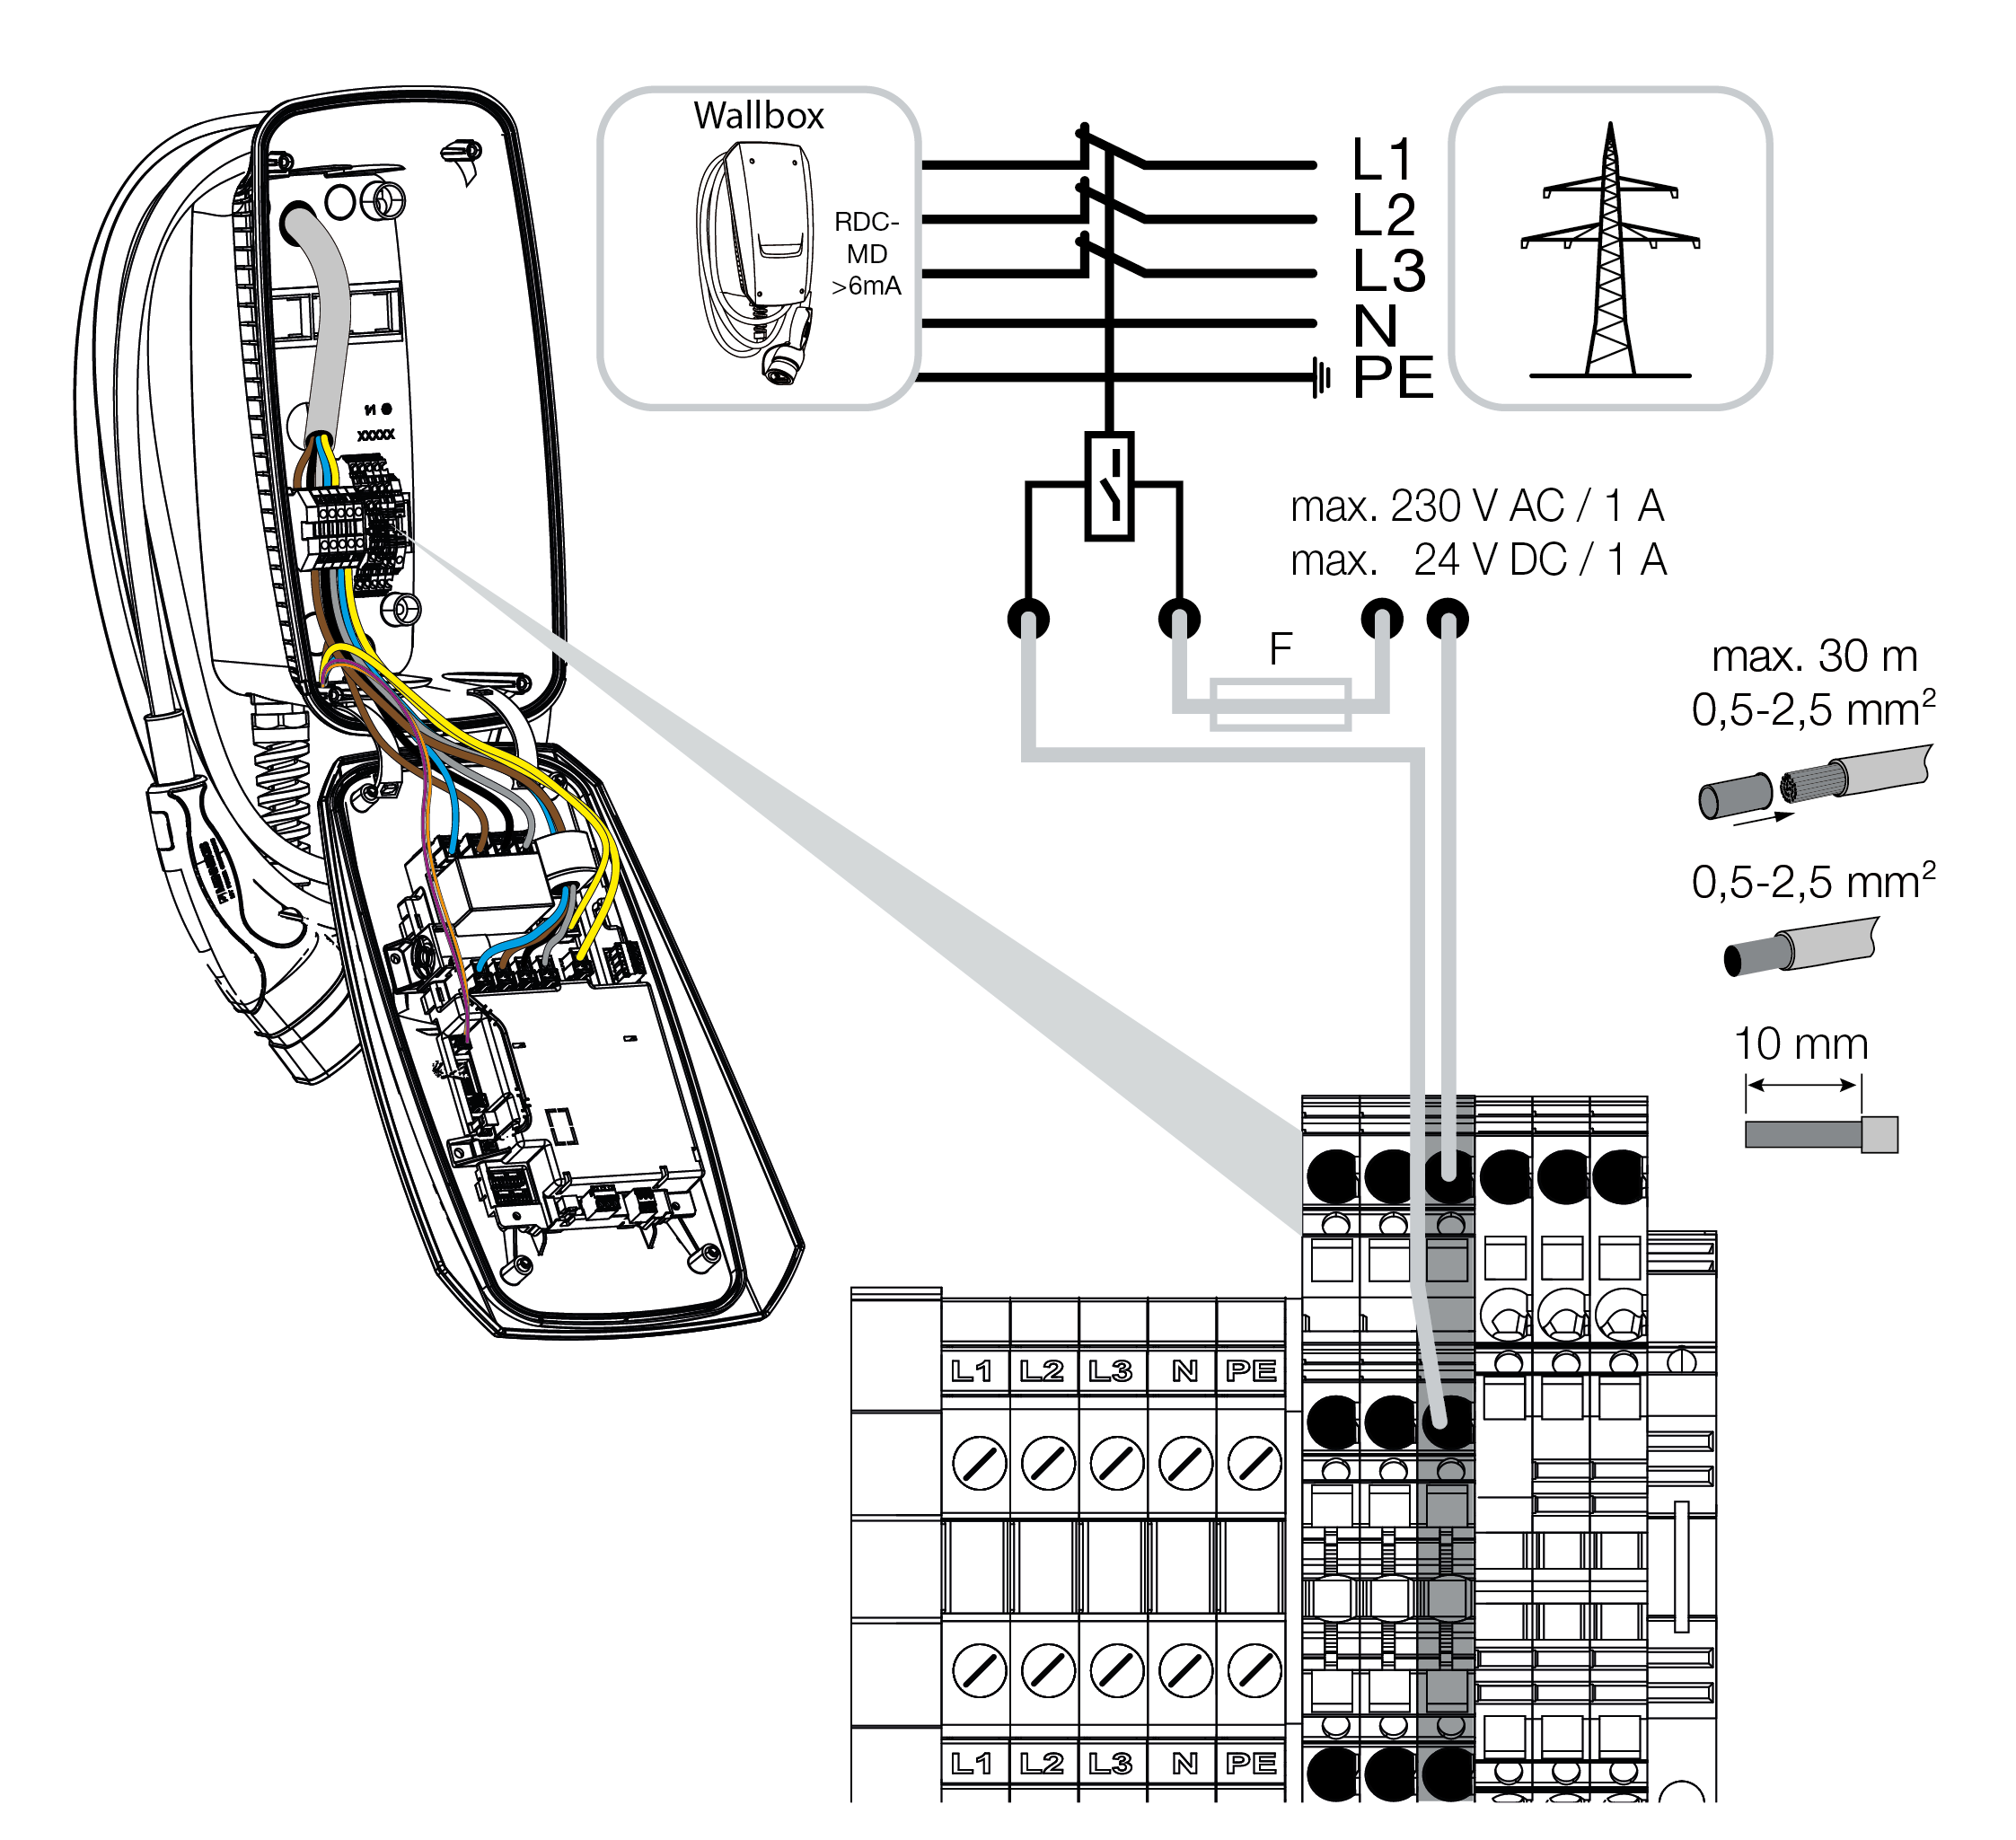
In some countries, automatic AC shutdown is required in the event of a fault. A shunt release can be connected to the wallbox for this purpose.
Connecting the shunt release
- Install shunt release in the house connection box. Follow the manufacturer's installation instructions.
- Route the cable between the wallbox and shunt release.
DANGER

Risk of death due to electrical shock and discharge!
If the cable is not kept reliably separate from active electrical equipment, touchable parts may be live. As a result, people may be seriously injured or killed by electric shock.
When routing and connecting the cable, keep it reliably separate from active electrical equipment.
- Use a suitable to tool to cut the required cable inlet out of the wallbox. Cable inlets are located on the rear, bottom and top.
- Insert the appropriate membrane cable entry (included in the scope of delivery) into the respective cable inlet.
For cable inlet on the top or bottom: Use membrane cable entries with strain relief.
For cable inlet on the rear: Use membrane cable entries without strain relief. - Insert the cables into the wallbox. To do this, a hole must be pierced in the membrane.
INFO

To prevent rainwater from entering, the hole in the membrane should not be any larger than the cables.
- Strip the cable.
- Strip 10 mm of insulation from the wires.
- Connect cable to wallbox terminal according to terminal labelling.
INFO

The potential-free contact (normally open contact) can be loaded to max. 230 V AC / 24 V DC / 1 A.

- Connect cable to shunt release.
- Wallbox connected to shunt release.