Visual roof planning
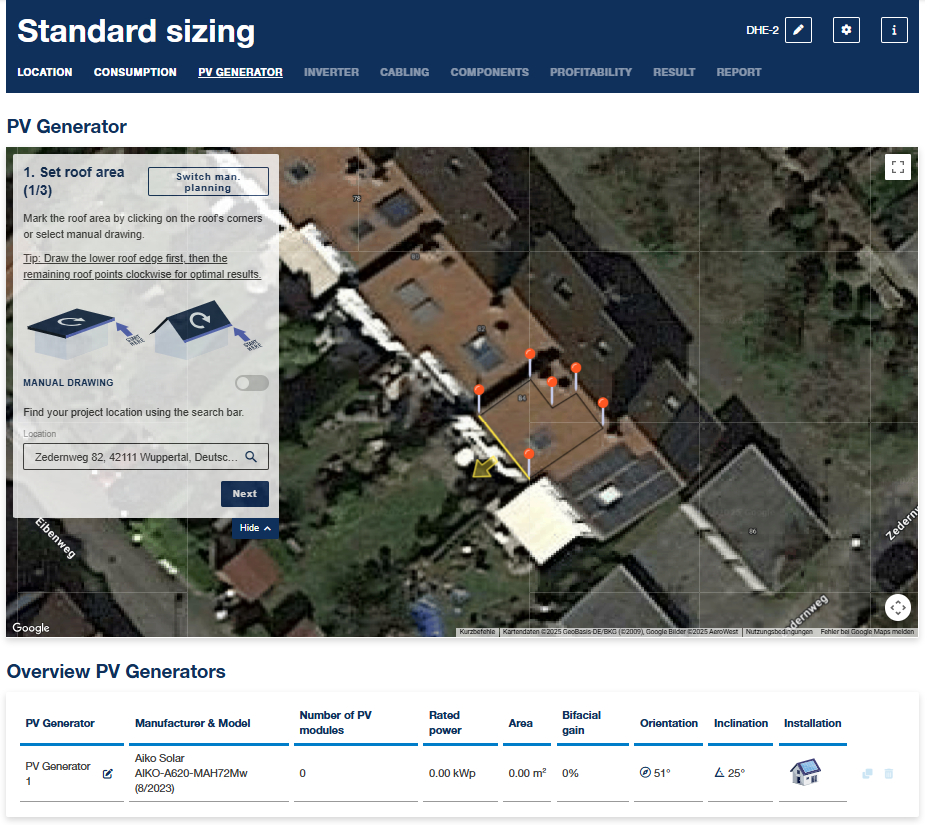
The PV generators on your roof can be planned directly using visual PV generator planning.
This includes the following:
- The location is taken straight from the location planning but can be changed.
- Mark the roof area in the view or create a manual roof drawing. Start the marking with the eaves of the roof.
- Define the edge of the roof (eaves)
- Enter the roof inclination
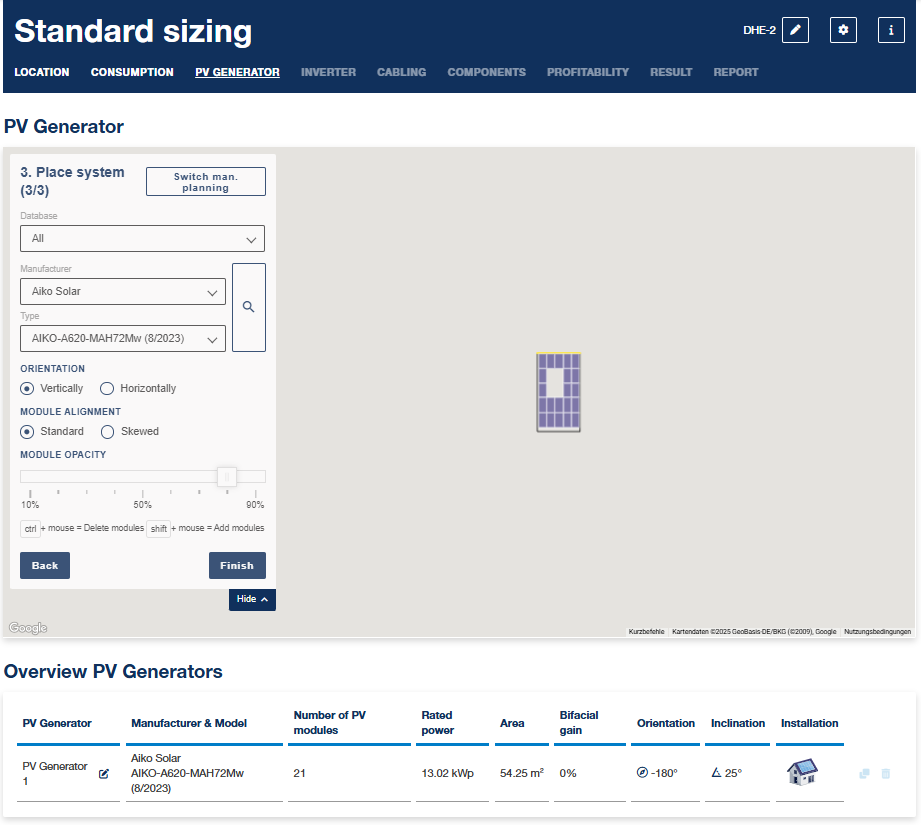
- Select modules and add to plan. Up to 4 module arrays can be planned.
Creating visual generator plan
- Roof area:
For visual roof planning, mark the roof area by clicking on the roof corners. If you select a point by mistake, you can remove it or move it by simply right-clicking on the point in question. - Alignment of the roof area:
Choose between pitched roof and flat roof. Using the Roof border button, you can mark the roof's eaves. To do this, simply press the button as many times as you need until the right side is marked.
Finally, set the roof inclination. - Positioning the modules:
Select the database from which you want to select the PV generators.
Then select the PV module under manufacturer and type.
Select how the PV modules are fitted on the roof.
Using visibility, you can make the modules more transparent in order to view the original roof more clearly.
Individual modules can be removed or added again by clicking on the module in question.
There is also an option for rotating the module alignment if the image material available is distorted.
If there are restricted areas on the roof, such as a chimney, windows etc., you can adjust the module visibility to 0% and remove the PV modules from these areas.
The following short-cut keys can be used:
- Ctrl + mouse = delete modules
- Shift + mouse = add modules
- WASD = move module array - The PV generators are shown on the roof.
- Press the Complete button to accept the plan.
- If more PV generators are to be created, click on Add PV generators and repeat the above steps.
Once you have completed the PV generator planning, use the right arrow key to go to the next page.
Creating a drawing for generator planning
- Select Manual drawing:
Go to Manual drawing. - Roof area:
Specify the width, length and alignment of the roof area and position the roof. - Alignment of the roof area:
Choose between pitched roof and flat roof. Using the Roof border button, you can mark the roof's eaves. To do this, simply press the button as many times as you need until the right side is marked.
Finally, set the roof inclination. - Positioning the modules:
Select the database from which you want to select the PV generators.
Then select the PV module under manufacturer and type.
Then select whether the PV modules are fitted on the roof in vertical or horizontal format.
Using visibility, you can make the modules more transparent in order to view the original roof more clearly.
Individual modules can be removed or added again by clicking on the module in question. - The PV generators are shown on the roof.
- If more PV generators are to be created, click on Add PV generators and repeat the above steps.
Once you have completed the PV generator planning, use the right arrow key to go to the next page.
- Click on the right arrow to go to the next page.