Initial commissioning via web browser
Initial commissioning via the web browser can be carried out using the inverter's Wifi access point or a LAN connection.
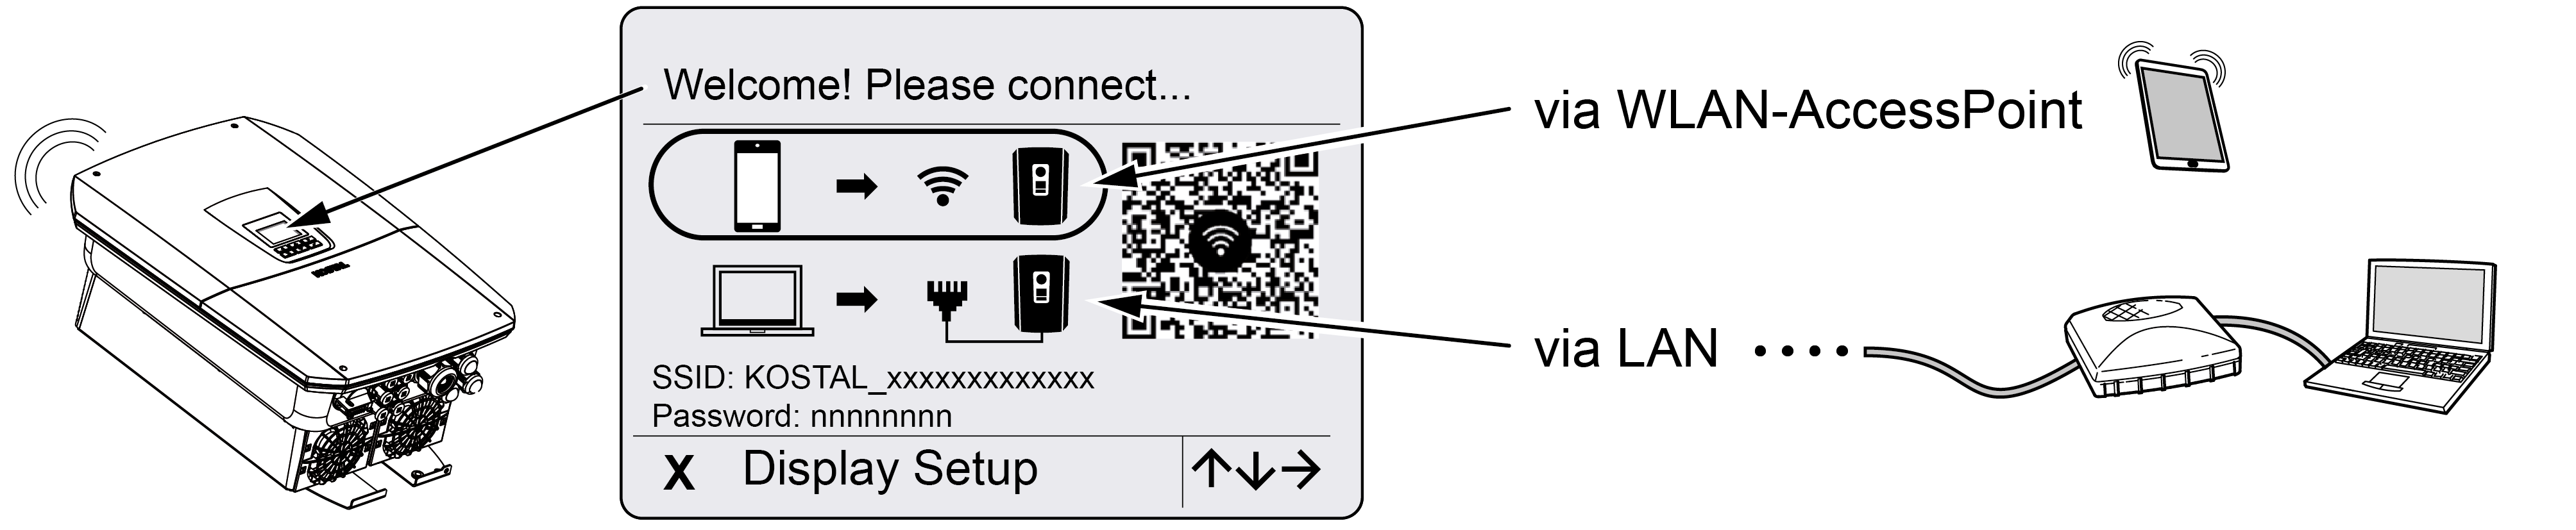
Select a connection for initial commissioning:
Selection: Wifi access point
The inverter's Wifi access point is used for the setup.
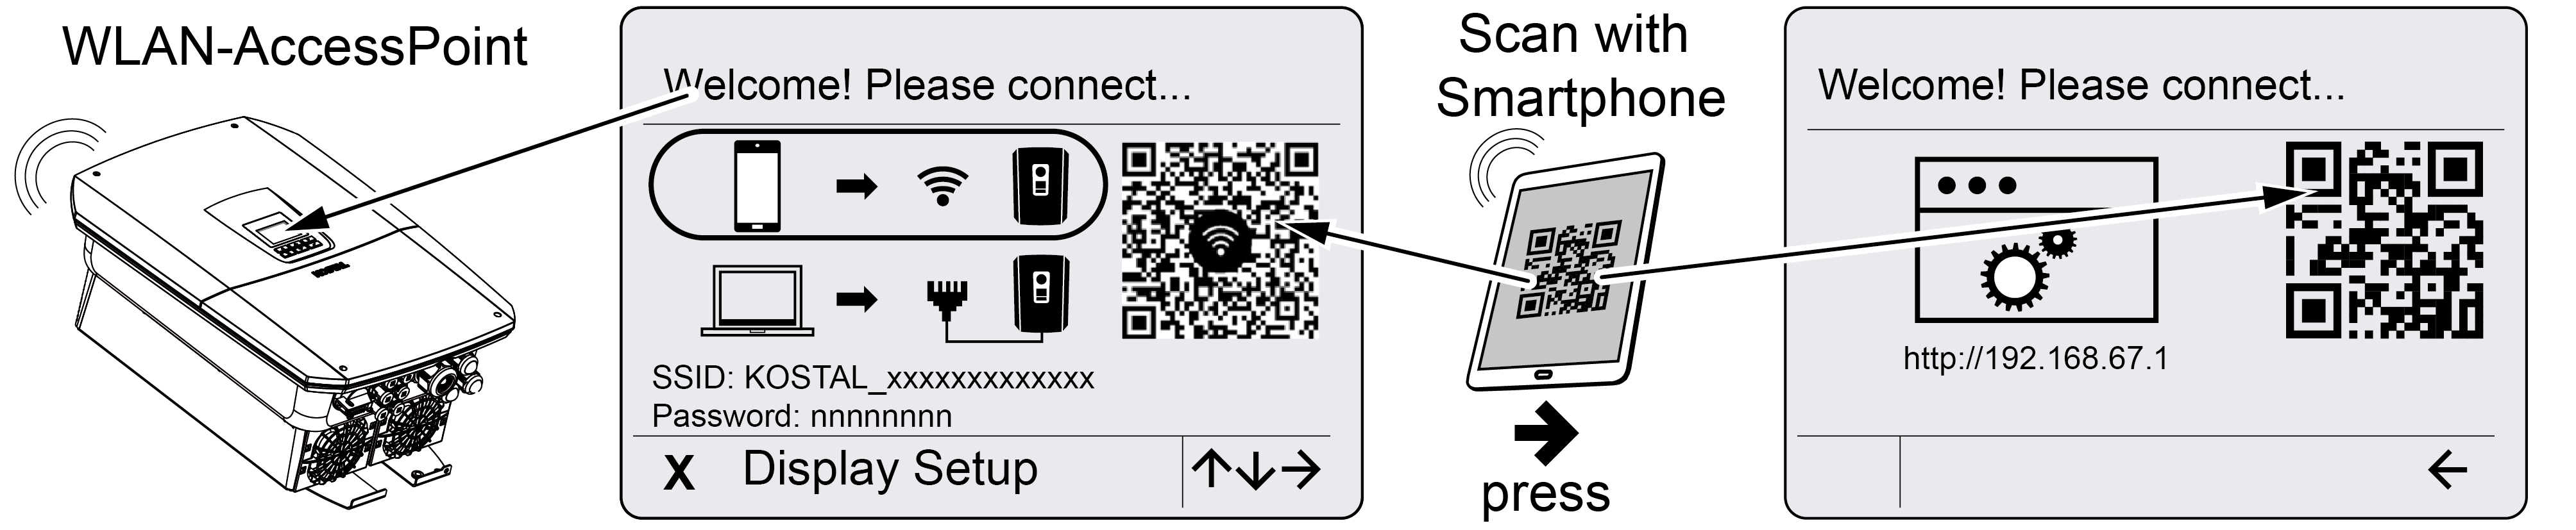
- Choose to connect via the Wifi access point for initial commissioning:
- Scan the QR code with your smartphone and connect to the inverter's Wifi access point. If this is not possible, you can establish the connection manually. Use the displayed SSID (KOSTAL_<inverter serial number>) and password (P<inverter item number>).
- Press the right arrow key on the inverter.
- The QR code for the Webserver for the initial setup wizard is displayed.
- Scan the QR code for the Webserver with your smartphone or enter the IP address displayed.
- The Webserver connection is established and the initial setup wizard is displayed. Continue with Setup wizard.
If the Webserver initial setup wizard does not start in the browser, enter the WLAN IP address (192.168.67.1) shown on the inverter display into a web browser on your smartphone.
INFO

If the settings for the Wifi access point are not changed after initial commissioning (SSID/password), the Wifi access point will be deactivated again after 120 minutes for security reasons. The Wifi access point can be configured in the Webserver under Settings > Network > Wifi > Wifi Mode > Access Point.
Selection: LAN cable
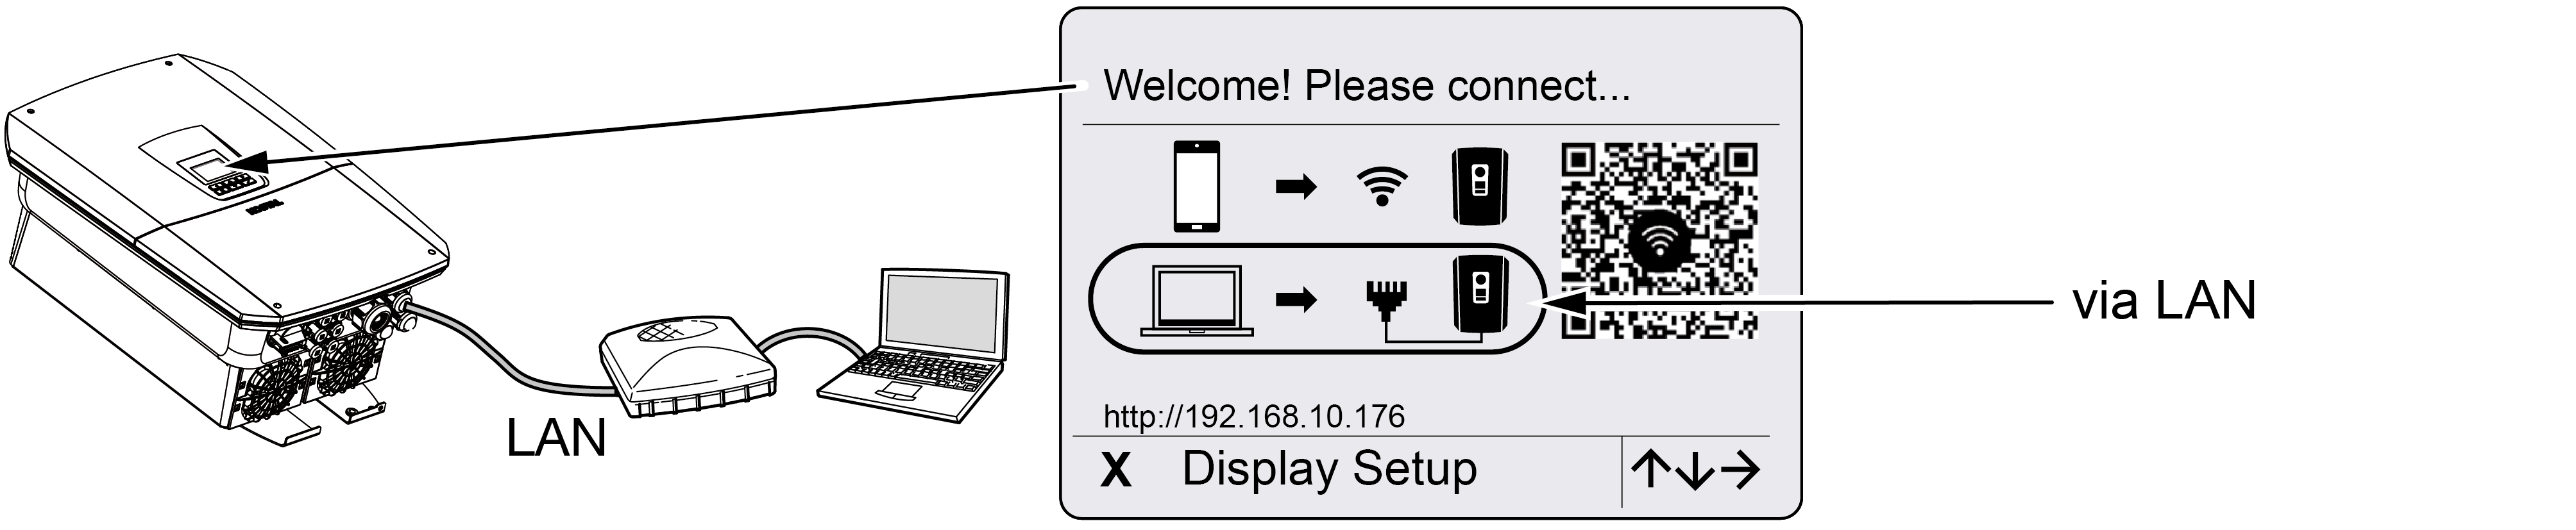
The inverter is connected to a router in the local network via a LAN cable and automatically obtains an IP address via a DHCP server.
- The inverter's Webserver can now be accessed in a web browser using an input device (e.g. PC). To do this, enter the IP address shown on the inverter display into a web browser on your input device.
- The Webserver connection is established and the initial setup wizard is displayed. Continue with Setup wizard.