Initial commissioning via KOSTAL Solar App and the setup wizard
To carry out the installation via the KOSTAL Solar App and the setup wizard, the following preconditions must be met.
- The KOSTAL Solar App must be installed on the smartphone.
- As an installer, you have set up an account in the KOSTAL Solar Terminal and are configured as a fitter for your company. If you are, you will automatically receive a service code, which is required during initial commissioning. You can view the service code in the KOSTAL Solar Terminal by going to My profile.
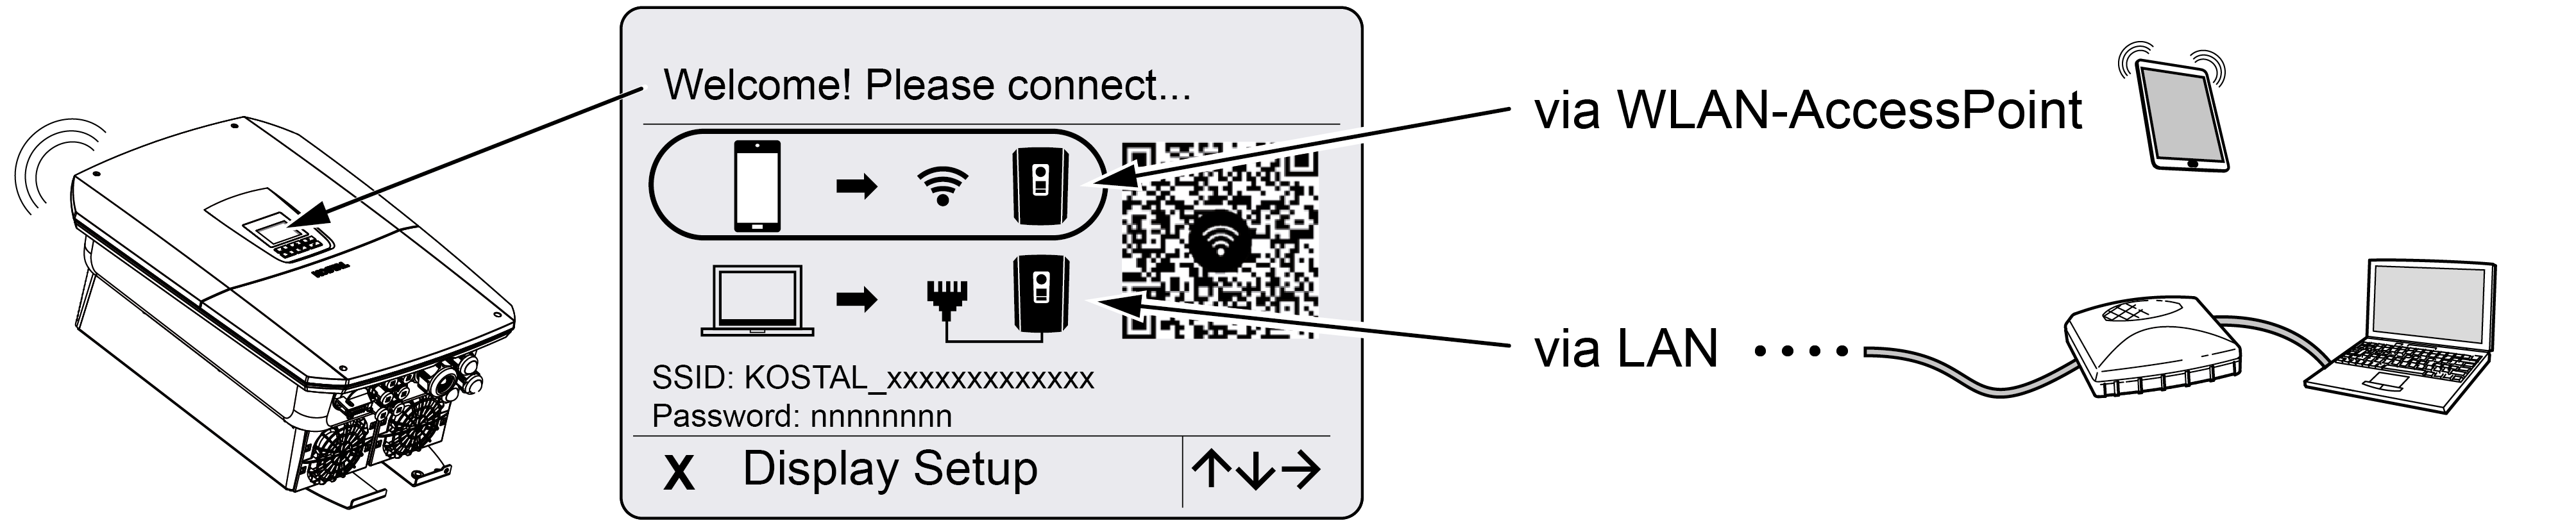
- The inverter’s WLAN access point is used to perform the setup via the KOSTAL Solar App.


Selecting type of connection for inverter and calling up the KOSTAL Solar App
- Choose connection via WLAN access point on the inverter.
- Launch the KOSTAL Solar App on your smartphone.
- If you have not yet logged in to the KOSTAL Solar Terminal, you will be automatically prompted to log in. When you log in, your data will be automatically stored in the KOSTAL Solar App, including the service code, if you have been set up as a fitter. You can, however, also enter the service code manually during commissioning.
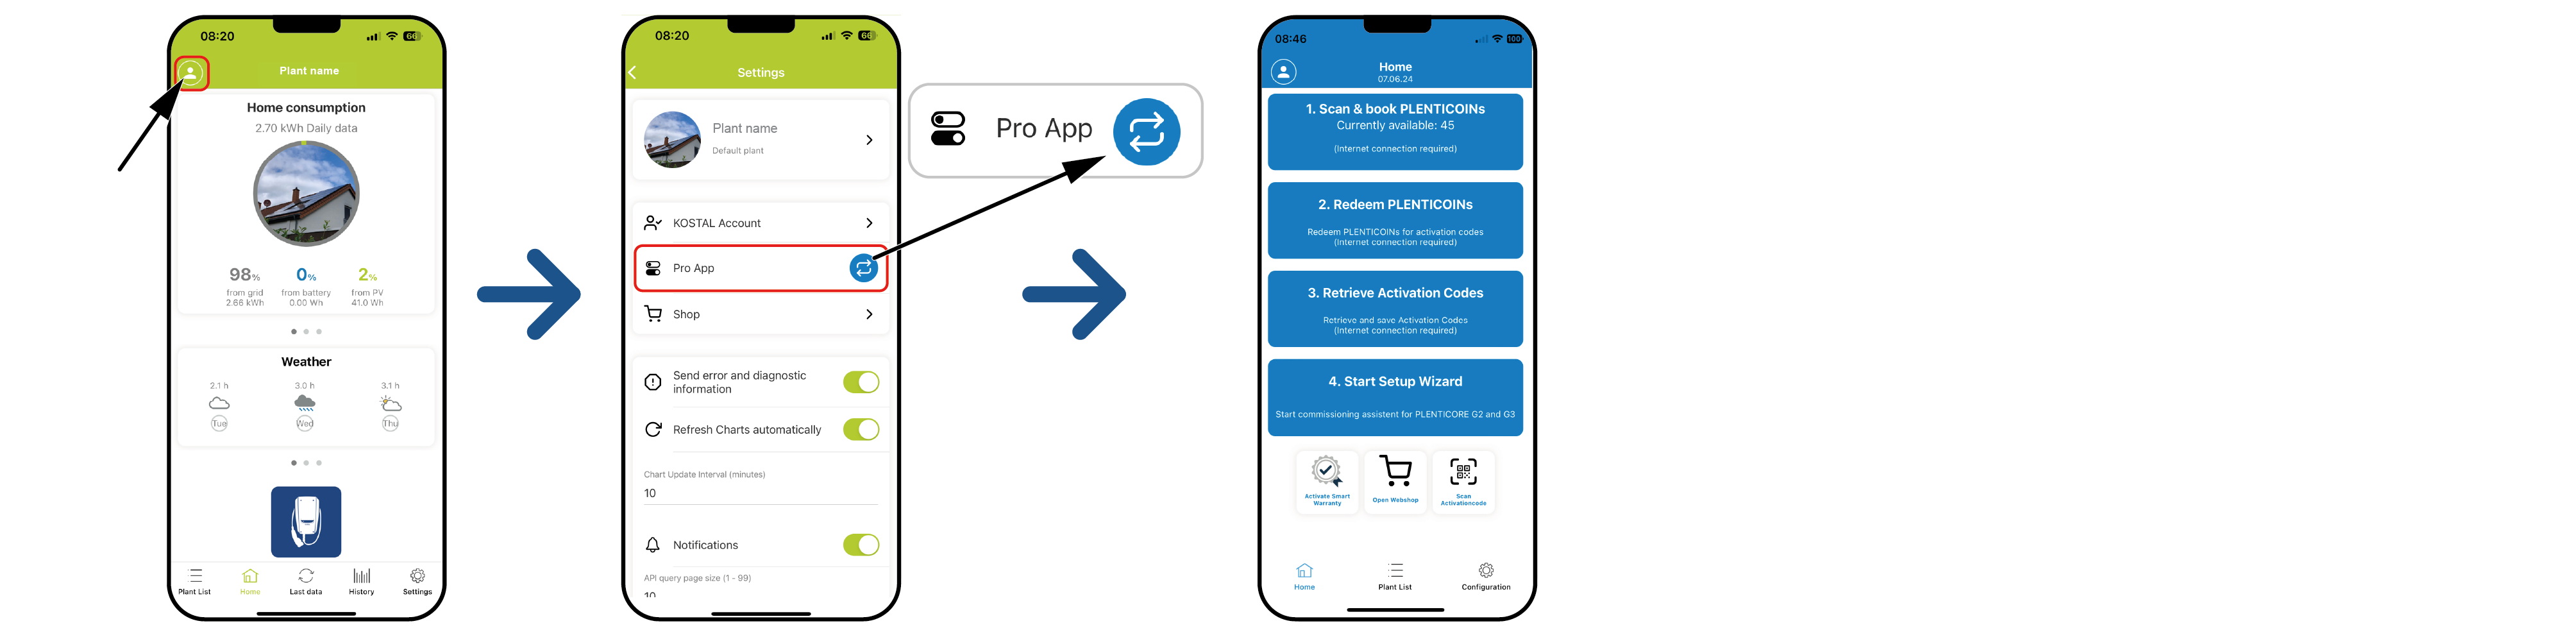
- In the KOSTAL Solar App, switch to Pro mode.
To do this, go to the settings in the top left and activate Pro mode.
Scanning & registering PLENTICOINs
There are certain ways in which product upgrades (e.g. for battery function and increased performance) can be made to the inverter. These are released in the inverter using activation codes. The activation codes required for the product upgrade can be redeemed in the online shop using PLENTICOINs. You can purchase PLENTICOINs from specialist retailers or the online KOSTAL Solar shop. They are credited to your company account via the KOSTAL Solar App or directly via the online KOSTAL Solar shop. The PLENTICOINs available are shown in the KOSTAL Solar App.
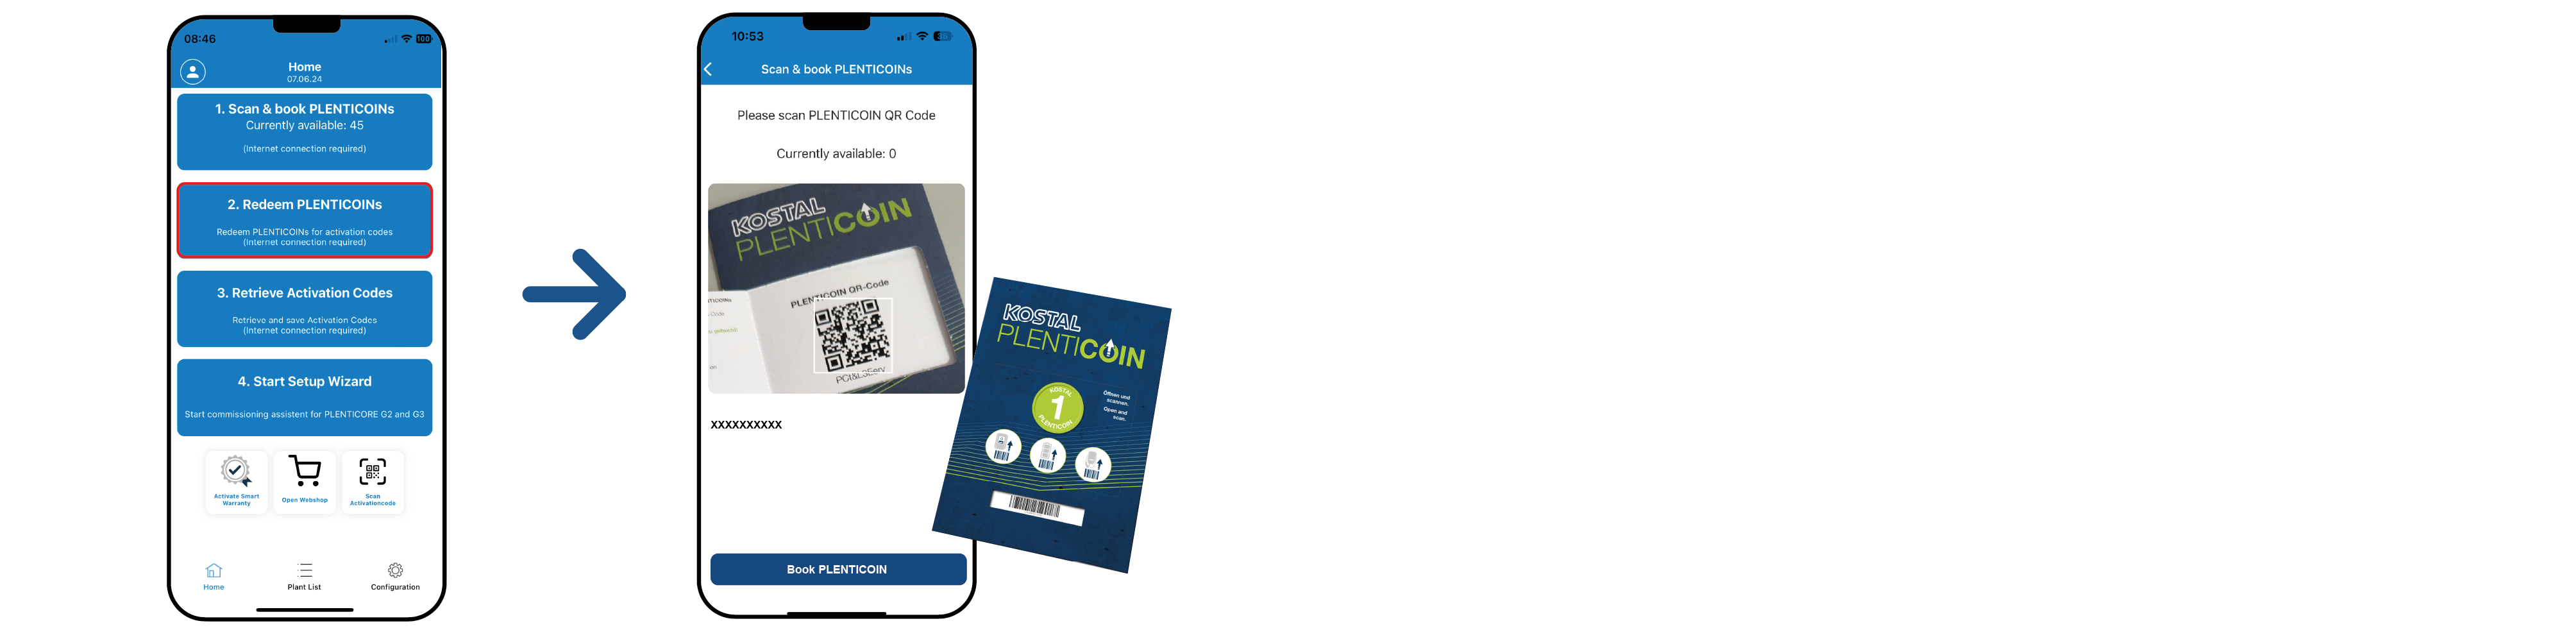
- Go to Scan & register PLENTICOINs.
- Scan the QR code from the PLENTICOIN single-use voucher.
- The code is recognised and displayed.
- Press the Register PLENTICOINs button to assign the single-use voucher to your company account.
- The single-use voucher has been credited to your company account and can now be used in the online KOSTAL Solar shop to purchase product upgrades.
Redeeming PLENTICOINs
If you require a product upgrade that you didn’t configure in advance for your inverter, you can use this menu item to purchase the product upgrade for your device and will then receive an activation code for it.
To do so, proceed as follows:
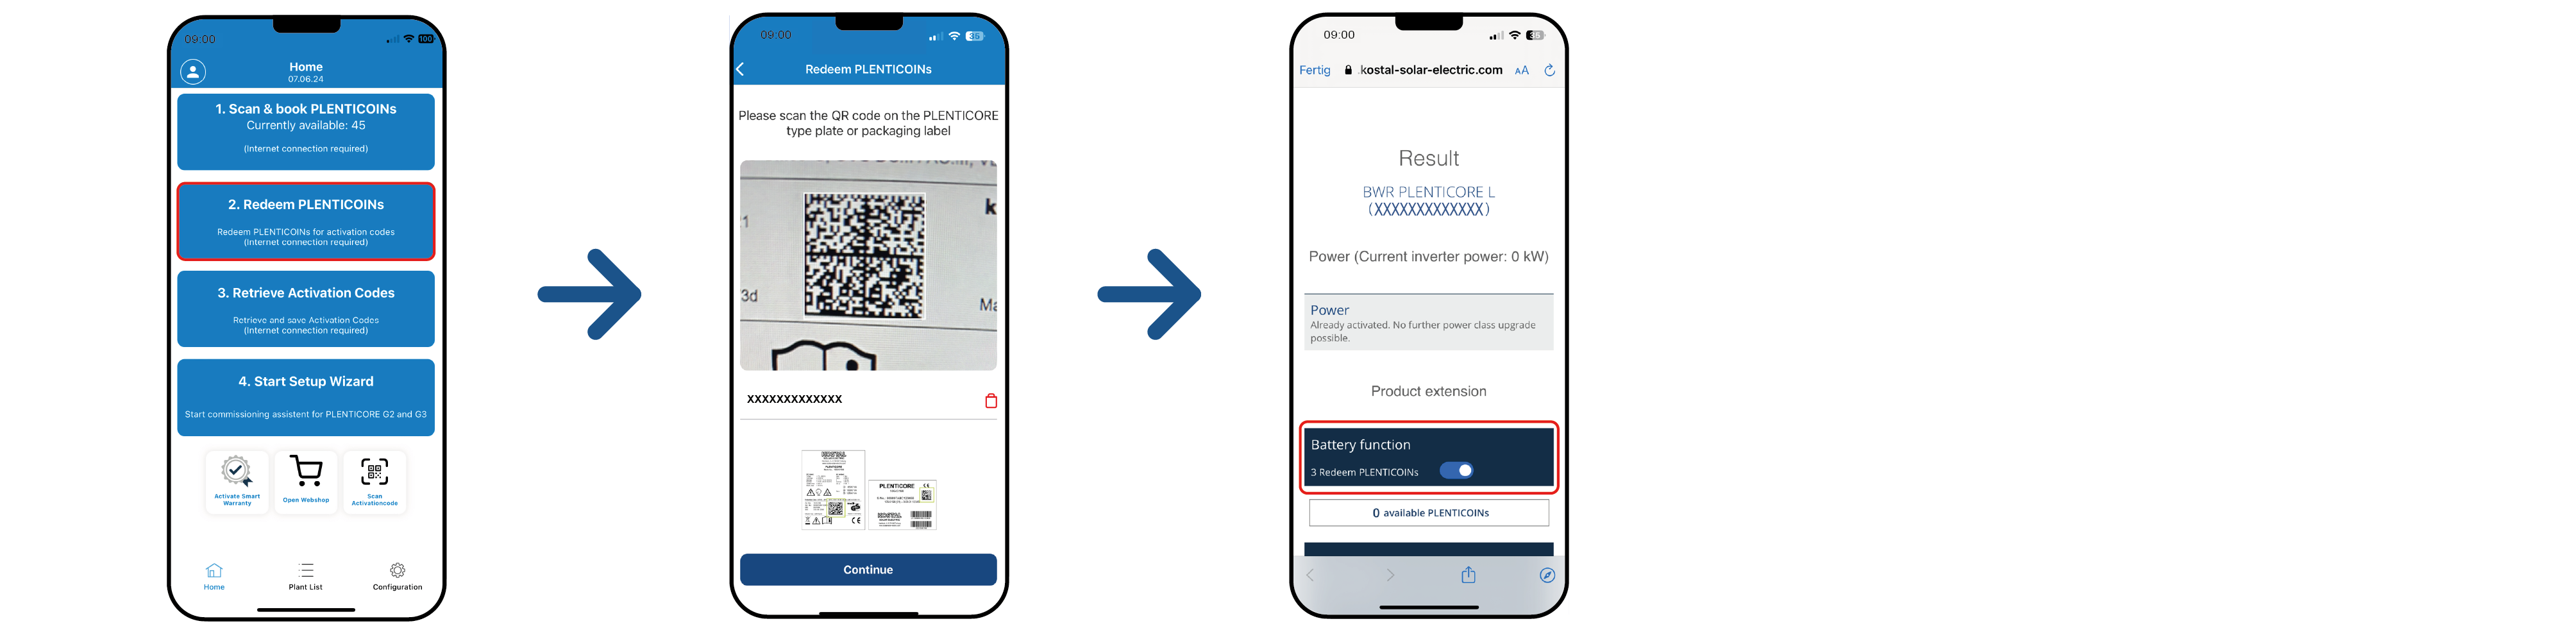
- Go to Redeem PLENTICOINs.
- Scan the type plate on the inverter.
- The inverter serial number is displayed.
- Click on Next.
- If you haven't yet logged into the KOSTAL Solar Terminal, enter your access details to do so.
- The product upgrades available for your inverter are then displayed for you.
- Select the product upgrade you need and scroll down.
- Select Redeem PLENTICOINs now and retrieve your activation code to purchase the product upgrade. If you don’t have enough PLENTICOINs, you can also purchase them directly by going to Instant PLENTICOIN purchase.
- The activation code has been assigned to the inverter and is ready to be called up.
Calling up activation codes
For initial commissioning, you will have to transfer the activation code to the smartphone. The benefit of this is that even if you have no or very poor Internet reception, you will have the necessary information available during initial commissioning.
To do so, proceed as follows:
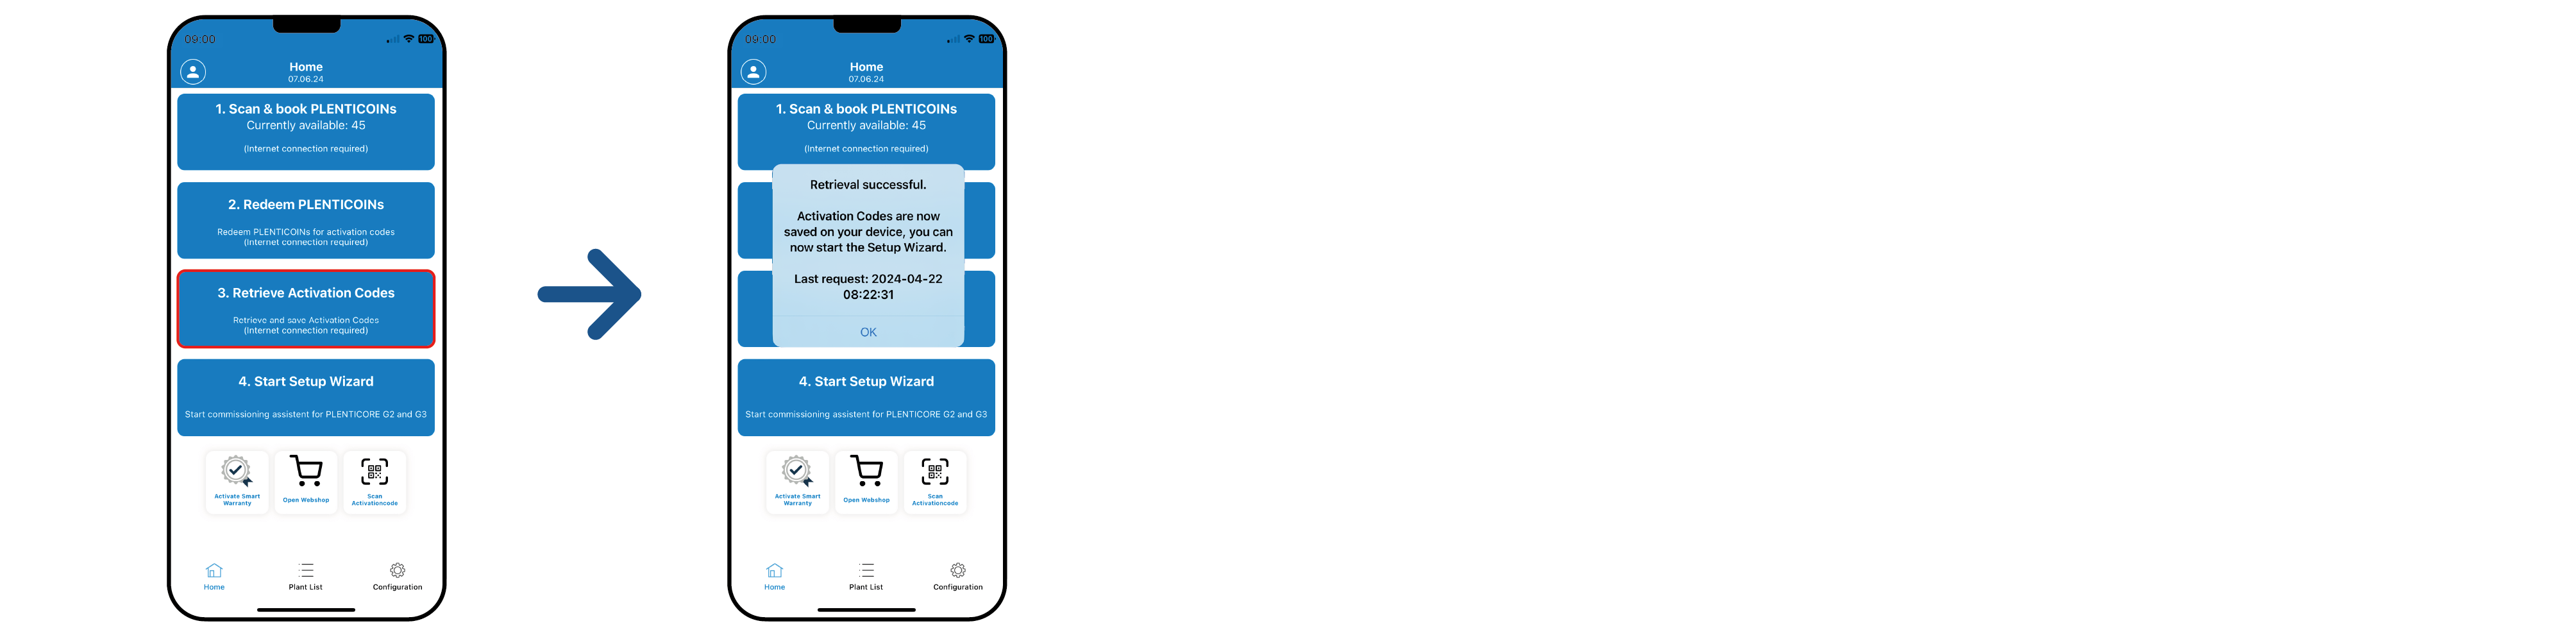
- Go to Call up activation codes.
- The activation codes that were assigned to your company account are called up.
- Click on OK.
- The activation codes are now on your smartphone and can be used for initial commissioning. The installation wizard uses the inverter serial number to automatically detect which product upgrades have been released.
Starting initial commissioning using the setup wizard
For initial commissioning, proceed as follows:
- Call up the setup wizard.
Select Connect WLAN using QR code.
Scan the QR code from the inverter display with your smartphone and connect to the inverter's WLAN access point. 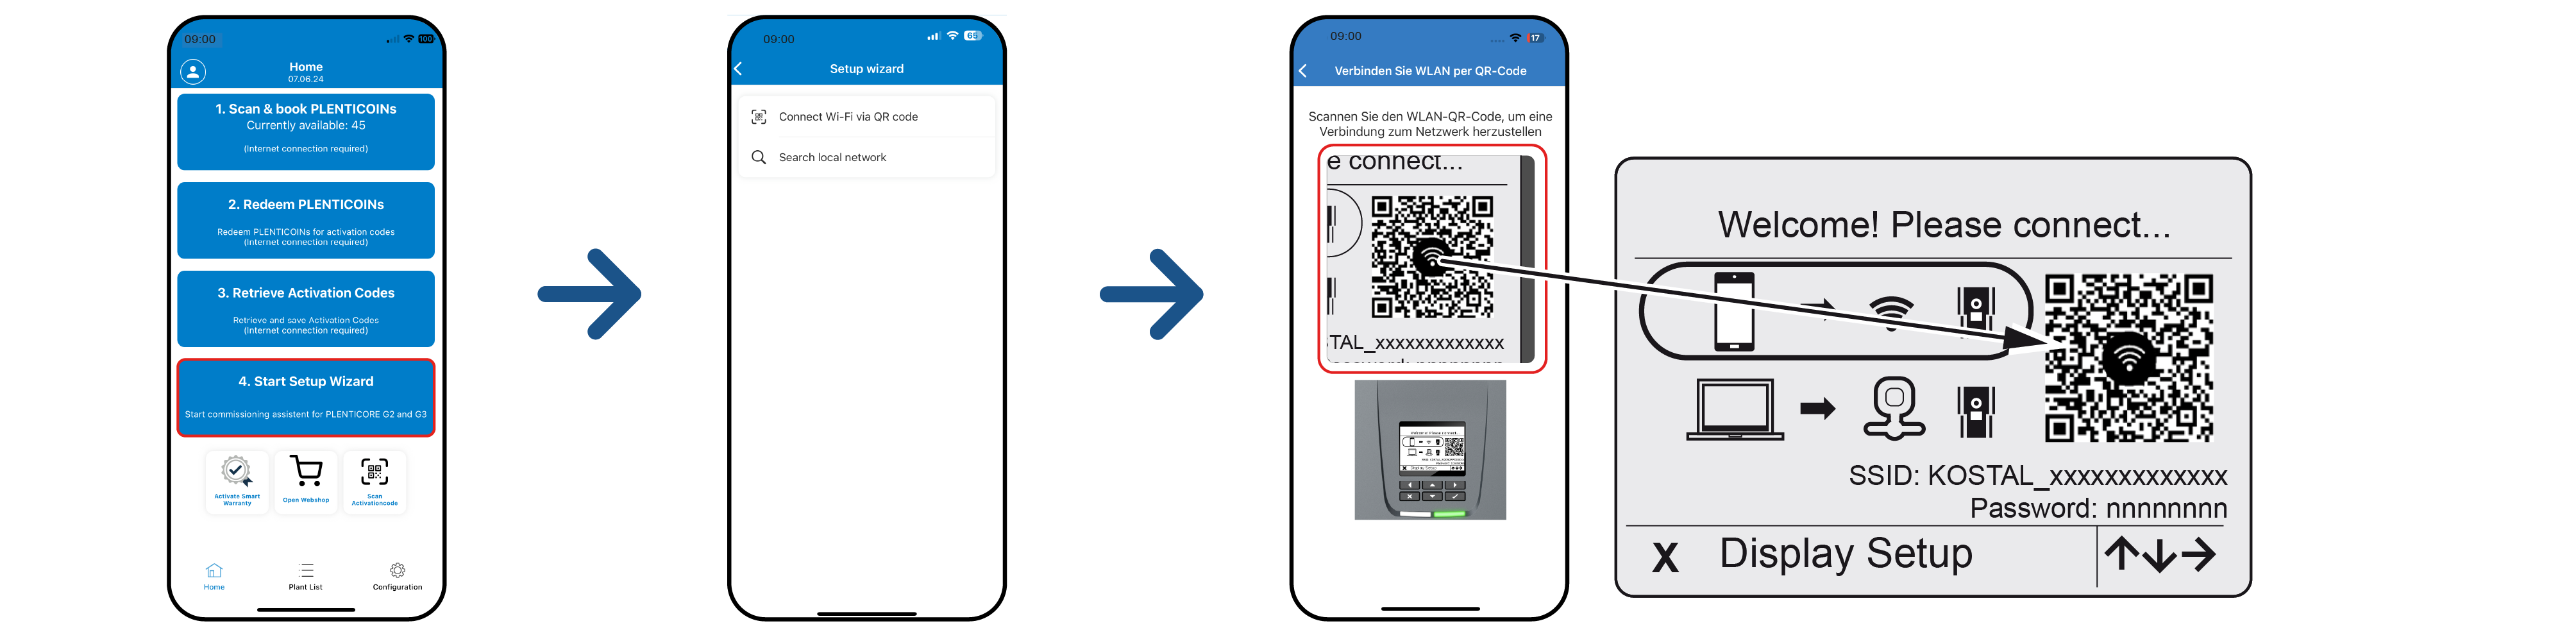
- Select Accept in response to questions about connection losses.
- Then connect to the inverter access point by selecting Connect and confirm with OK.
- The smartphone is now connected to the inverter WLAN access point.
- Now scan the QR code from the inverter type plate and press Next.
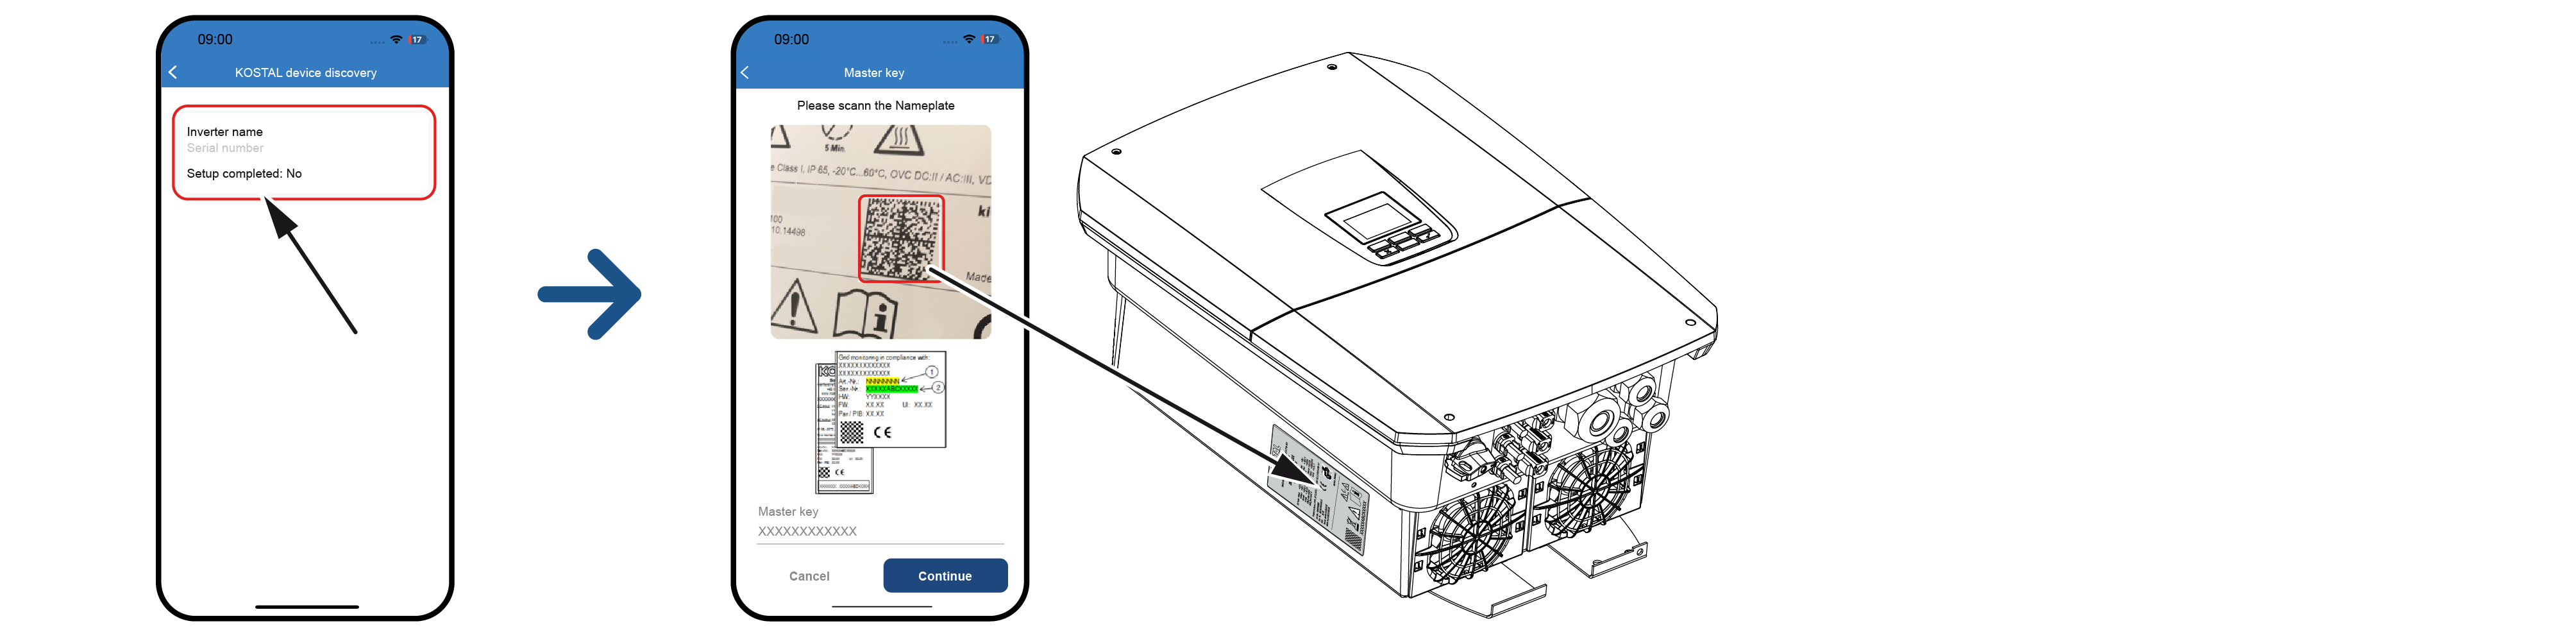
- Press Next.
- If your installer service code cannot be automatically called up via the KOSTAL Solar Terminal, enter it here and press Next.
- The Webserver connection is established and the initial setup wizard is displayed. Continue with Setup wizard.
INFO

If a message appears saying that the inverter's WLAN is not connected to the Internet and mobile data should be used instead, remain connected to the inverter's WLAN.