Setup wizard via the KOSTAL Solar App
INFO

Activation codes purchased and received in advance with the KOSTAL Solar App are automatically transferred to the inverter and can be used during initial setup.
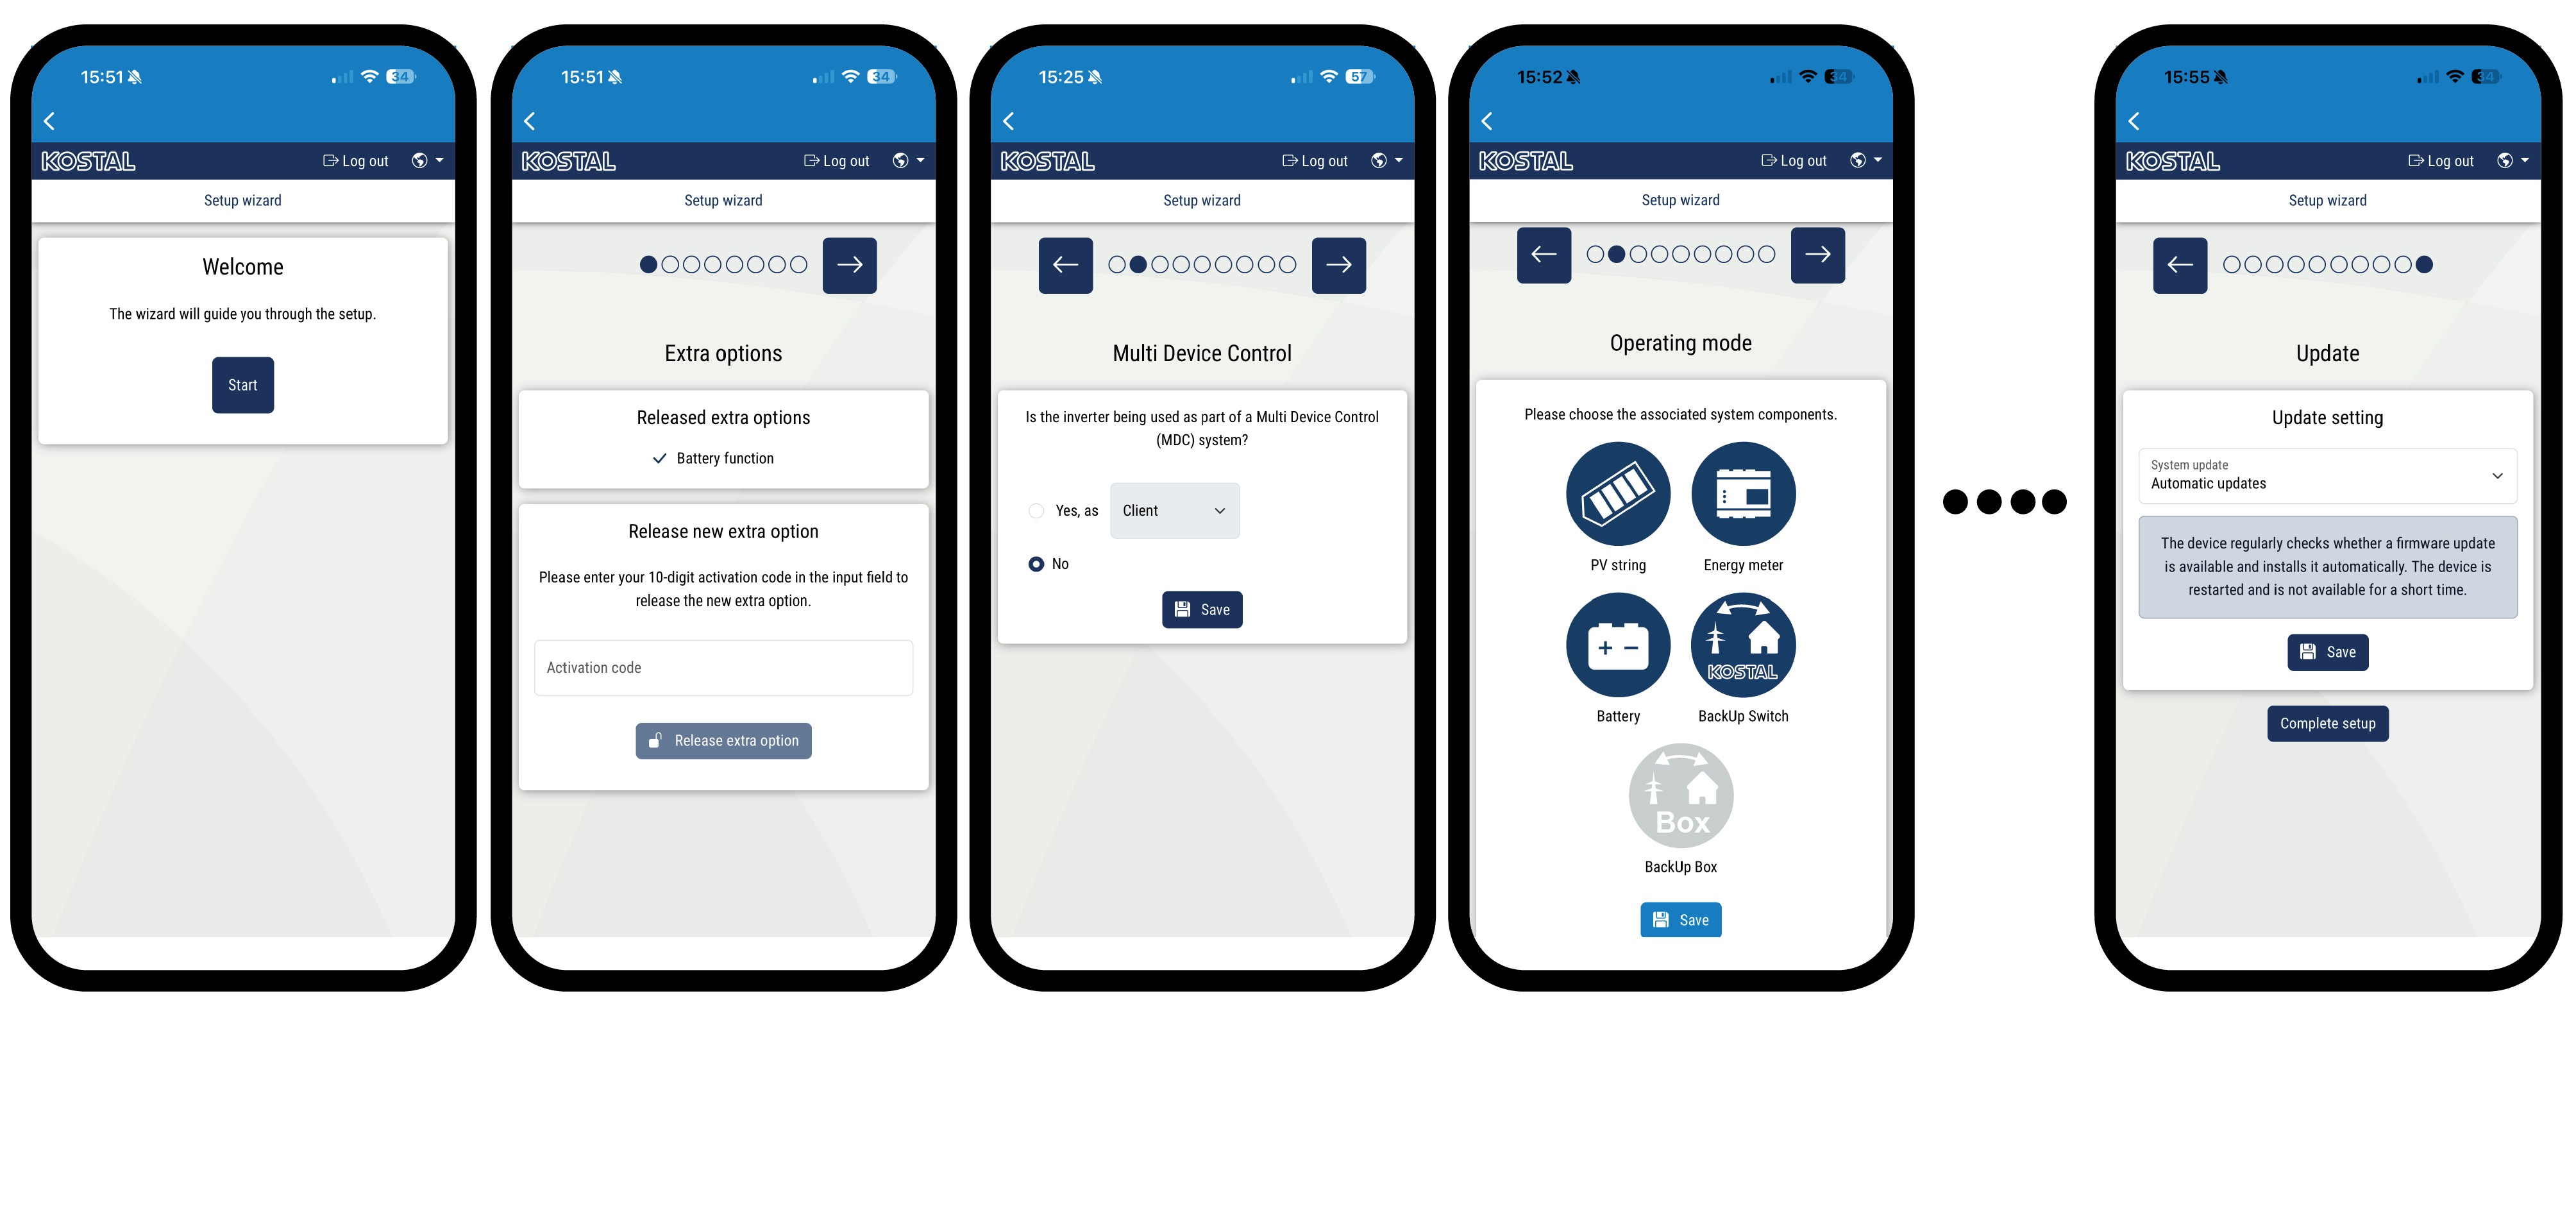
- Press the right arrow key.
- If this does not happen automatically, log in to the inverter as an installer using the master key and service code. The master key can be found on the inverter's type plate.
- Under Additional options, activate the functions you require for this inverter (e.g. battery function). The additional functions are usually subject to a charge.
- Under Multi Device Control (MDC), select the configuration for the inverter. This selection will then be taken into account during the initial installation.
Further information on this can be found in the Multi Device Control chapter.
As an MDC host: The inverter can control other inverters or an ENECTOR G2 wallbox connected to it via a LAN cable. A battery should be connected to the inverter. If no battery is connected to the MDC host inverter, no battery can be connected to any other MDC client inverter either. If the system contains several MDC inverters with a connected battery system, the Multi Battery Control (MBC) add-on option must be enabled on the MDC host inverter.
As an MDC client: The inverter is controlled via an MDC host inverter. A battery connected to the MDC client inverter is controlled via the MDC host inverter. To do this, the Multi Battery Control (MBC) add-on option must be enabled on the MDC host inverter.
No MDC: The inverter (stand-alone) cannot control any other inverters and is not connected to any other inverter. This option must be selected if no devices are to be controlled via the inverter or if other devices (e.g. G1 inverter / G1 wallbox) are controlled via a KSEM. - Under operating mode, select which components should be taken into consideration during the initial setup (PV generators, installed energy meter, connected battery, a KOSTAL BackUp Switch or an automatic backup box). The following items are then taken into consideration during the initial installation.
- Follow the instructions of the initial installation wizard.
- Save each page using the Save button.
- Press the right arrow key to go to the next page.
- Setup complete.

- Once initial commissioning is complete, go to System analysis. Here you can observe the inverter’s start process and react straight away to any events or installation errors. You will find more information about the system analysis at Menu - Service - System analysis.
- To update the inverter to the latest version, perform an update.
- Finally, you can change the network settings, download the parameterisation report and, if necessary, start the self-test of the NA protection.
- The inverter has been set up and is ready for operation.